

Setting Up the OWASP Broken Web Applications
OWASP Broken Web Applications (BWA) is a virtual machine that hosts a collection of intentionally vulnerable applications designed for cybersecurity training. Developed by the Open Web Application Security Project (OWASP), these applications are created specifically to provide a safe environment for practicing and testing various web vulnerabilities. This guide explains how to set up and run the OWASP BWA virtual machine.
- Download the latest version of OWASP Broken Web Applications Project Files from here. The download should begin automatically after a few seconds.

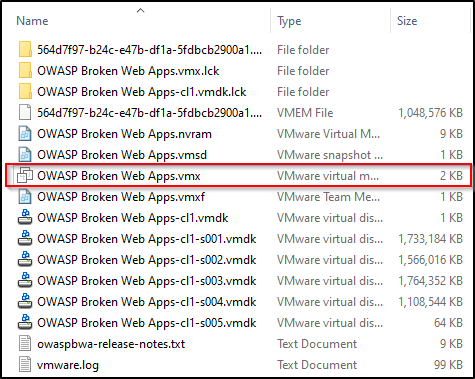
2. Once the download is completed, extract the archive file to view files inside the archive. Your files should look similar to mines below.
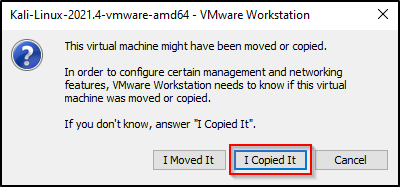
3. We’re almost there! Simply double click on the .vmx file (OWASP Broken Web Apps.vmx) to start the virtual machine. The first time running the VM will produce a prompt asking whether you Moved It or Copied It. Select I Copied It.
The VM will then load. The next step is logging in. The credentials of the OWASP BWA virtual machine are:
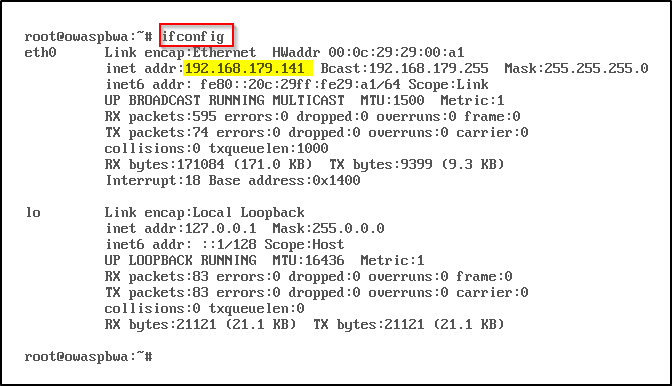
owasp login: root
Password: owaspbwa
4. Your OWASP BWA virtual machine is now successfully up and running. Use ifconfig to check for an IP address.
5. Next, ping a system on the internet, such as Google’s DNS server at 8.8.8.8.
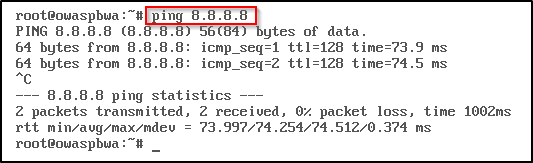
Since we are receiving replies, our VM is ready to go.
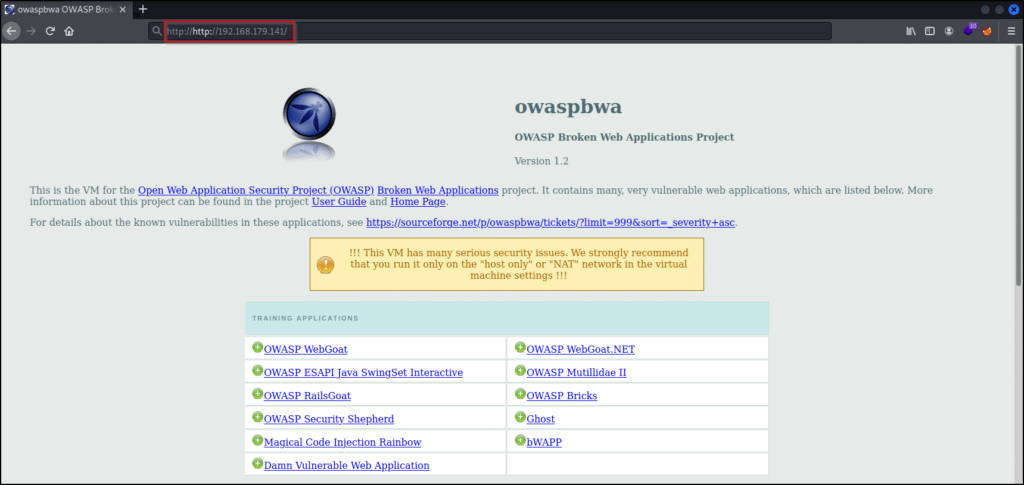
6. The final step is connecting to the OWASP BWA from our Kali machine. In Kali, open Firefox and type http://<the IP address found in Step 4>. In my case, the address is http://192.168.179.141.
7. (This step is optional)
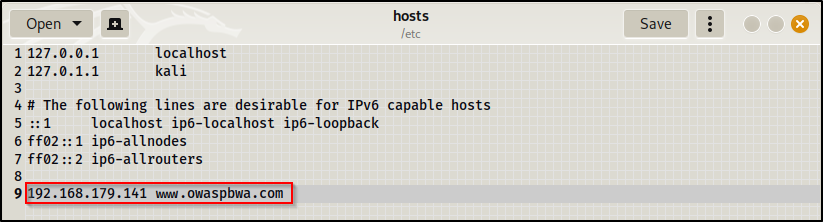
Instead of entering the IP address of the application, we can add a domain name for the application instead, which is more user-friendly to remember. To do this, use your favourite text editor like nano or gedit to edit the /etc/hosts file. This can be done by opening a terminal, then copying and pasting the following command.
gedit /etc/hostsIn the hosts file, add a line which indicates the IP address from Step 4, followed by a space, then the domain name for the application. It should look similar to the file below (except your IP address might be different). Save then close the file.
Now, we can reach the application using the domain name entered in the hosts file, instead of the IP address.

There you have it! Your OWASP BWA machine is now ready to rock n’ roll!

